Bolt.new · Expo
Bolt.new mobile app: from Expo Go to TestFlight
Rokas Kašinskas — Co-founder, VibeViewPublished 2026-10-29Updated 2026-10-29
Bolt.new · Expo
Expo Go is handy for a first look, but it’s Expo’s app, not yours. What people install from the stores is a build of your own, with its own name, icon and native code. Bolt stops before that build. This guide takes a Bolt project from the Expo Go preview to its own build, and from there to TestFlight and Google Play.
We tested the steps on October 29, 2026 with LockFit, a public, MIT-licensed workout app made from Bolt’s Expo template. With no Mac and no Expo account, it built, then ran on a cloud iPhone and on a cloud Android phone. The store upload is the one part we skipped.
Bolt asks you to say “mobile app” in your first prompt, since “Projects created for web do not easily switch over to mobile” (Bolt: Expo for mobile apps, checked October 29, 2026). Then it writes an Expo project, and its Device Preview shows a QR code; scanning it with Expo Go loads the project on your phone.
Expo calls a development build “your own version of Expo Go”, one where you can use any native library (Expo: development builds, checked October 29, 2026). Bolt doesn’t make that build. Its docs say to “download the code and open it in a code editor”. From there they point to Expo’s build service for store builds (same Bolt page). This guide uses VibeView cloud builds for that part.
| What you want to do | Bolt | VibeView |
|---|---|---|
| Write the app | Bolt does this | Nothing changes |
| Try it | Expo Go, by QR code | Your own build, on a live phone in the browser |
| Build it | Its docs point to Expo’s build service | vibeview build --cloud on a cloud machine |
| See an edit on the device | Bolt’s preview | Fast Refresh from your computer |
| Share it with testers | TestFlight or Play testing, after a store build | A share link that opens the app in a browser, before any store build |
| Send a build to TestFlight or Google Play | Not done in Bolt | vibeview submit |
npm and npx, the two commands that install and run JavaScript tools.No Mac, Xcode, Android Studio or Expo account is needed. We ran every command on a Mac without opening Xcode. Windows and Linux are untested so far.
Copy the project to your computer. Bolt offers two ways to get it:
Download. In Bolt, click the project title at the top left, then Download (Bolt: manage your projects, checked October 29, 2026). Unzip it, open a terminal in the folder, and run:
git init
git add -A
git commit -m "Bolt.new project"
These commands start tracking the folder with git and save every file in a first snapshot, called a commit.
GitHub. Connect GitHub in Bolt. Copy the repository to your computer with git clone <your repository URL>, and cd into the folder it creates. Read Bolt and your computer on one repository before you push anything back.
Then run npm ci. It installs the exact package versions listed in package-lock.json, which Bolt projects usually include. If yours has none, npm install creates it; commit the new file.
Check how old the project is. Many Bolt projects are older than they look: of 57 recent public ones we checked, 24 were on Expo SDK 53 or older. Open package.json and find expo under dependencies. A value such as "~54.0.10" means SDK 54. On 54 or newer, skip to step 3.
On SDK 53 or older, the iPhone build fails with Xcode 26.5, the default on our cloud builds (Xcode 27.1, the other choice, is newer still). Xcode 26.4 and later reject the copy of the fmt library that older React Native compiles from source (react-native#55601). SDK 54 avoids it, because it ships React Native for iOS precompiled (Expo SDK 54 notes, checked October 29, 2026). Android builds fine on SDK 53, but upgrade anyway, so the iPhone version and the Android version run the same code:
npx expo install expo@^54.0.0
npx expo install --fix
npx expo install react-native-worklets
npx expo-doctor
git commit -am "Upgrade to Expo SDK 54"
The first line moves Expo itself to SDK 54, and the second moves every other Expo package to the version SDK 54 expects. The third adds react-native-worklets, which the newer Reanimated (the animation library in Bolt’s template) needs. npx expo-doctor checks the project for mismatched versions and should pass every check. git commit -am saves every changed file in one commit.
Reanimated 4 only runs on React Native’s New Architecture. Bolt’s template already turns it on ("newArchEnabled": true in app.json). After an upgrade this large, click through the app to check that its screens still behave.
Name the app and choose its ID. Bolt’s template keeps a generic name and sets no store ID. Expo then invents IDs that start with com.anonymous, and the iPhone one doesn’t match the Android one. That works for a preview, but not for the stores.
Pick one ID written like a reversed web address, for example com.yourcompany.lockfit. Apple calls it the bundle identifier and Google the package name. Neither store lets you change it after the first upload. Set it in app.json, under expo, and leave the file’s other fields as they are:
{
  "expo": {
    "name": "LockFit",
    "slug": "lockfit",
    "ios": { "bundleIdentifier": "com.yourcompany.lockfit" },
    "android": { "package": "com.yourcompany.lockfit" }
  }
}
Do this before the first cloud build, then save it with git commit -am "Set app name and IDs". With this change, our next iPhone build arrived in VibeView as LockFit, under the new ID. We rebuilt only the iPhone version after renaming, not the Android one.
Get the VibeView command and log in.
npm install -g vibeview
vibeview login
The first line installs the vibeview command. vibeview login opens a sign-in page in your browser, or prints its link if no browser opens. Approve it, then come back to the terminal.
Build both versions in the cloud.
vibeview build --cloud --platform android --profile preview
vibeview build --cloud --platform ios --profile preview
A preview build carries your app’s code inside it, so the app opens without your computer. The CLI spots the Expo project and offers a build command. The command installs the packages, runs npx expo prebuild to generate the native project for that phone, and builds it. Choose Use detected default. When it asks which app the build belongs to, the first answer, Create a new app from this build, is the right one.
Your choices go into vibeview.json, under two names: preview, and development for live editing (below). Commit vibeview.json. The iPhone command finds the Xcode project by the app’s name from step 3, and vibeview.json also remembers which VibeView app each version belongs to. If you change the name or ID after a build, delete vibeview.json and build again: the CLI asks its questions again and makes new apps.
Start this first build by hand, because the CLI needs your answers. Once vibeview.json holds them, a coding agent or an automated pipeline can start builds too.
While a fresh cloud machine does the work (a Mac for the iPhone version), the build log scrolls by in your terminal. Our Expo builds took 6 to 7 minutes each, so each one uses several of your plan’s build minutes. VibeView then adds the app to your account, with the name, ID and icon from the build. The iPhone version and the Android version show up as two separate apps. Cloud Builds has the details for Expo projects.
To try the newest preview build on a cloud iPhone, run:
vibeview dev --standalone --platform ios--standalone opens the build by itself, without connecting to your computer. If you don’t name a build, it opens the app’s newest preview build. Your browser shows the device, and you use it with the mouse and keyboard. For the Android version, use --platform android. Add --detach to keep the session running in the background, and stop it with vibeview dev-stop. A running session uses streaming minutes, your plan’s allowance of device time. The dashboard works too: on Devices, choose the app, then start it there.
Open the Android version too. On our Android phone, one card read “240 of” where the iPhone showed “240 of 300”. If you only ever checked Bolt’s preview on your own phone, you’d have missed it.
Fast Refresh is the React Native feature that swaps in your edited code a moment after you save, without restarting the app. To use it with your React Native app, you need one development build. It doesn’t carry your code inside. It loads it from Metro, the development server that npx expo start runs on your computer.
Make the development build once. With no --profile, the CLI builds the development profile saved in step 5 of Get the app building:
vibeview build --cloud --platform iosYou only build again after a native change, such as adding a package with native code or editing app.json.
Start Metro in one terminal:
npx expo startMetro prints a QR code for Expo Go. You can ignore it, because the cloud device finds Metro on its own.
Connect a cloud iPhone from another terminal window:
vibeview dev --platform iosThe app on the cloud iPhone now runs the code from your computer. Save a file, and the screen changes within a few seconds, without losing your place in the app. Live Development covers the options.
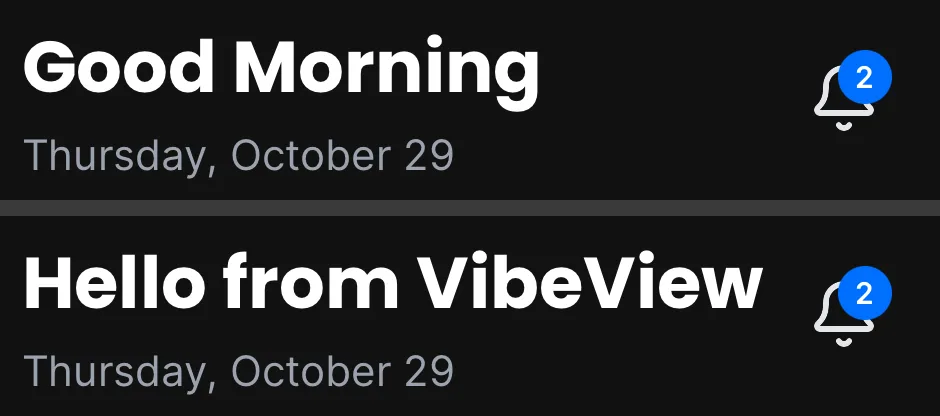
We tried this on the iPhone only. Android follows the same steps with --platform android, but we haven’t run it yet. You don’t need to add expo-dev-client, the package Expo’s docs suggest for development builds: the loop worked without it.
A preview build doesn’t need your computer, so anyone can open it. In the dashboard, go to Sharing → Share an app and choose the app. Whoever gets the link taps through your app in a browser tab, without installing it or Expo Go. Their time in the app counts against the streaming minutes in your plan. Sharing your app lists the options.
Register the app with Apple and Google. Add it in App Store Connect (Apple’s publishing site) and in Play Console (Google’s), using the ID you chose in step 3 of Get the app building. An upload can’t create the app for you. Next, add the key VibeView uses for uploads in Builds → Stores: an App Store Connect API key for Apple, a service account key for Google (Store Submission).
Set up signing. Each store only accepts builds signed with your keys, which proves the app comes from you. VibeView can create Apple’s signing files from your App Store Connect key and generate Google’s (App Signing). An Expo project keeps no native folders in git to hold those settings, so they go in two small add-on files called config plugins. Build an Expo app without EAS explains both and links copies you can use. This is the most technical step here.
Build and upload.
vibeview build --cloud --production --platform ios --auto-submit
vibeview build --cloud --production --platform android --auto-submit
--auto-submit uploads each build as soon as it succeeds. On the first run, the CLI offers a release build command for the Expo project and keeps it as the production profile. To upload an existing build instead, run vibeview submit --platform ios --latest.
Your iPhone build shows up in TestFlight, Apple’s app for beta testers. Your Android build goes to Google Play’s internal testing track, unless you’ve set another. The rest happens on Apple’s and Google’s own sites: asking for App Store review, writing the store listing, adding screenshots and answering the privacy questions. Each of these is listed in Store Submission, with where to find it. LockFit never got a production build, so this part comes from the docs, not from our run.
Once your project is on GitHub, Bolt and your computer edit the same copy. Bolt commits each change that doesn’t break the project, and it “checks GitHub every 30 seconds for any updates made outside Bolt and pulls those in” (Bolt: GitHub, checked October 29, 2026). If Bolt and GitHub both change at once, Bolt’s copy wins. In Bolt’s words, it “keeps your changes and overwrites the GitHub version”, so edits pushed from your computer at that moment are lost.
Push your app.json, SDK upgrade and vibeview.json commits while nobody is working in Bolt. Afterwards, change something small in Bolt and confirm your edits survived. We haven’t tested how Bolt treats vibeview.json, a file it didn’t create. We also haven’t checked whether asking Bolt to upgrade the SDK matches step 2.
When vibeview.json is in the repository, the VibeView GitHub App can build each push for you. Bolt pushes after every change it makes, and each build costs minutes, so turn it on only for the branches you release from.
Bolt’s template targets phones. For TV, React Native has a separate edition, react-native-tvos, that builds for Apple TV and Android TV. Moving to it takes changes beyond what Bolt writes, and we haven’t tried it with a Bolt project. Roku channels are written in a different language. For TV apps, VibeView offers Apple TV, Android TV and also Roku devices; TV Testing explains how they work.
fmt and consteval. Usually the project is on Expo SDK 53 or older, so run the upgrade in step 2. On SDK 54 or newer, check whether the project turns on useFrameworks (in expo-build-properties), which compiles React Native from source again.expo-doctor says react-native-worklets is missing. Run npx expo install react-native-worklets.com.anonymous. Set the name and ID as in step 3, delete vibeview.json, commit, and build again.--app is required. It doesn’t know which app to open yet. Run vibeview list-apps, then run the same vibeview dev command again with --app <app_id> added.npx expo start is still running.No. Bolt writes and previews the app. Building it, uploading it and asking Apple for review all happen outside Bolt, and this guide covers each step.
Yes. The iPhone build runs on a cloud Mac, and the cloud iPhone opens in any browser. We haven’t run the setup commands on Windows ourselves yet. TestFlight itself requires Apple Developer Program membership.
Not for anything in this guide. Bolt’s own Expo page notes that its terminal may ask you to log in to Expo, but VibeView’s builds and devices never use that login.
Only a little. LockFit needed a new name and ID in its app.json file, and an SDK upgrade because it was on SDK 53. The newer Bolt projects we checked were already on SDK 54 or later.
Expo Go runs your code inside Expo’s own app. The build your users install has your app’s name, icon and native packages, so trying that build shows what they’ll get, and it’s the same build that goes to TestFlight and Google Play.
Open a live iOS simulator, Android emulator, Apple TV, Android TV or Roku in your browser.
Start free